C# Graphical User Interface Tutorial
C# has all the features of any powerful, modern language. In C#, the most rapid and convenient way to create your user interface is to do so visually, using the Windows Forms Designer and Toolbox. Windows Forms controls are reusable components that encapsulate user interface functionality and are used in client side Windows based applications.
A control is a component on a form used to display information or accept user input. The Control class provides the base functionality for all controls that are displayed on a Form.
From the following steps you can understand how to place a new control on windows Form.
How to create a new project in C# ?
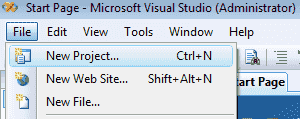
Open your Visual Studio Environment and Click File->New Project
Then you will get a New Project Dialogue Box asking in which language you want to create a new project.
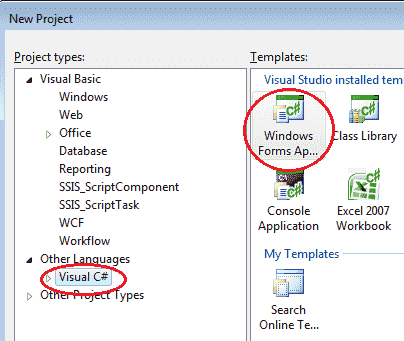
Select Visual C# from the list, then you will get the following screen.
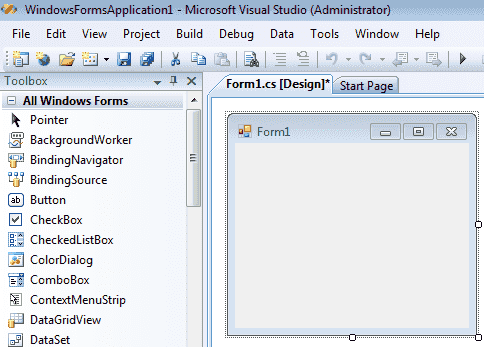
Now you can add controls in your Form Control.
How to add controls to Form ?
In the left side of the Visual Studio Environment you can see the Tool Box. There are lots of controls grouping there in the Tool Box according to their functionalities. Just click the + sign before each group then you can see the controls inside the group. You can select basic controls from Common Controls group. You can place the control in your Form by drag and drop the control from your toolbox to Form control.
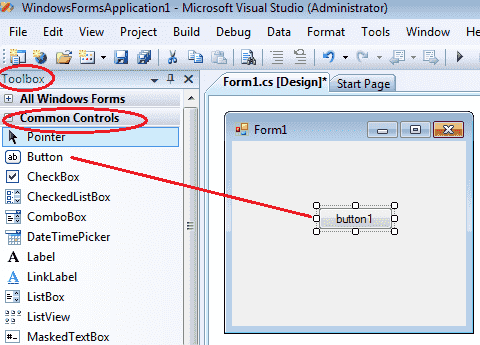
How to drag and drop controls ?
In the above picture we drag and drop the Button control from Toolbox - Common control to Form control.
Now you can start write codes on each control to create your programs. From the following lessons you can study how to use these Windows Forms Controls in your C# applications.
- C# Visual Studio IDE
- How to Create a C# Windows Forms Application
- C# Label Control
- C# Button Control
- C# TextBox Control
- C# ComboBox
- C# ListBox Control
- C# Checked ListBox Control
- C# RadioButton Control
- C# CheckBox Control
- C# PictureBox Control
- C# ProgressBar Control
- C# ScrollBars Control
- C# DateTimePicker Control
- C# Treeview Control
- C# ListView Control
- C# Menu Control
- C# MDI Form
- C# Color Dialog Box
- C# Font Dialog Box
- C# OpenFile Dialog Box
- C# Print Dialog Box
- keyPress event in C# , KeyDown event in C# , KeyUp event in C#
- How to create Dynamic Controls in C# ?
- Keep Form on Top of All Other Windows
- C# Timer Control